Pages

Wednesday, September 28, 2011

Lotsa Headbands!

Wanna know something weird?  I love, love, love headbands.  I love making them, I love giving them as gifts, and I think a cute headband totally completes an outfit. 

That's not the weird part....the weird part is that I don't ever wear them.  I think everyone in the whole world looks so cute in headbands...but me :o(  I know, sad, right?!  I can just never get them to look right on me.  Either my hair looks too smushed, or I try to do the cute little poof thing with the headband and I end up looking like I have an abnormally shaped head, or I try to carefully place a headband in and around my perfectly placed hair and it just looks like a have a headband put in there that isn't really doing anything, gah!  I need headband 101 or something!  I'm trying to work on that though, because I so want to be a headband wearer. 

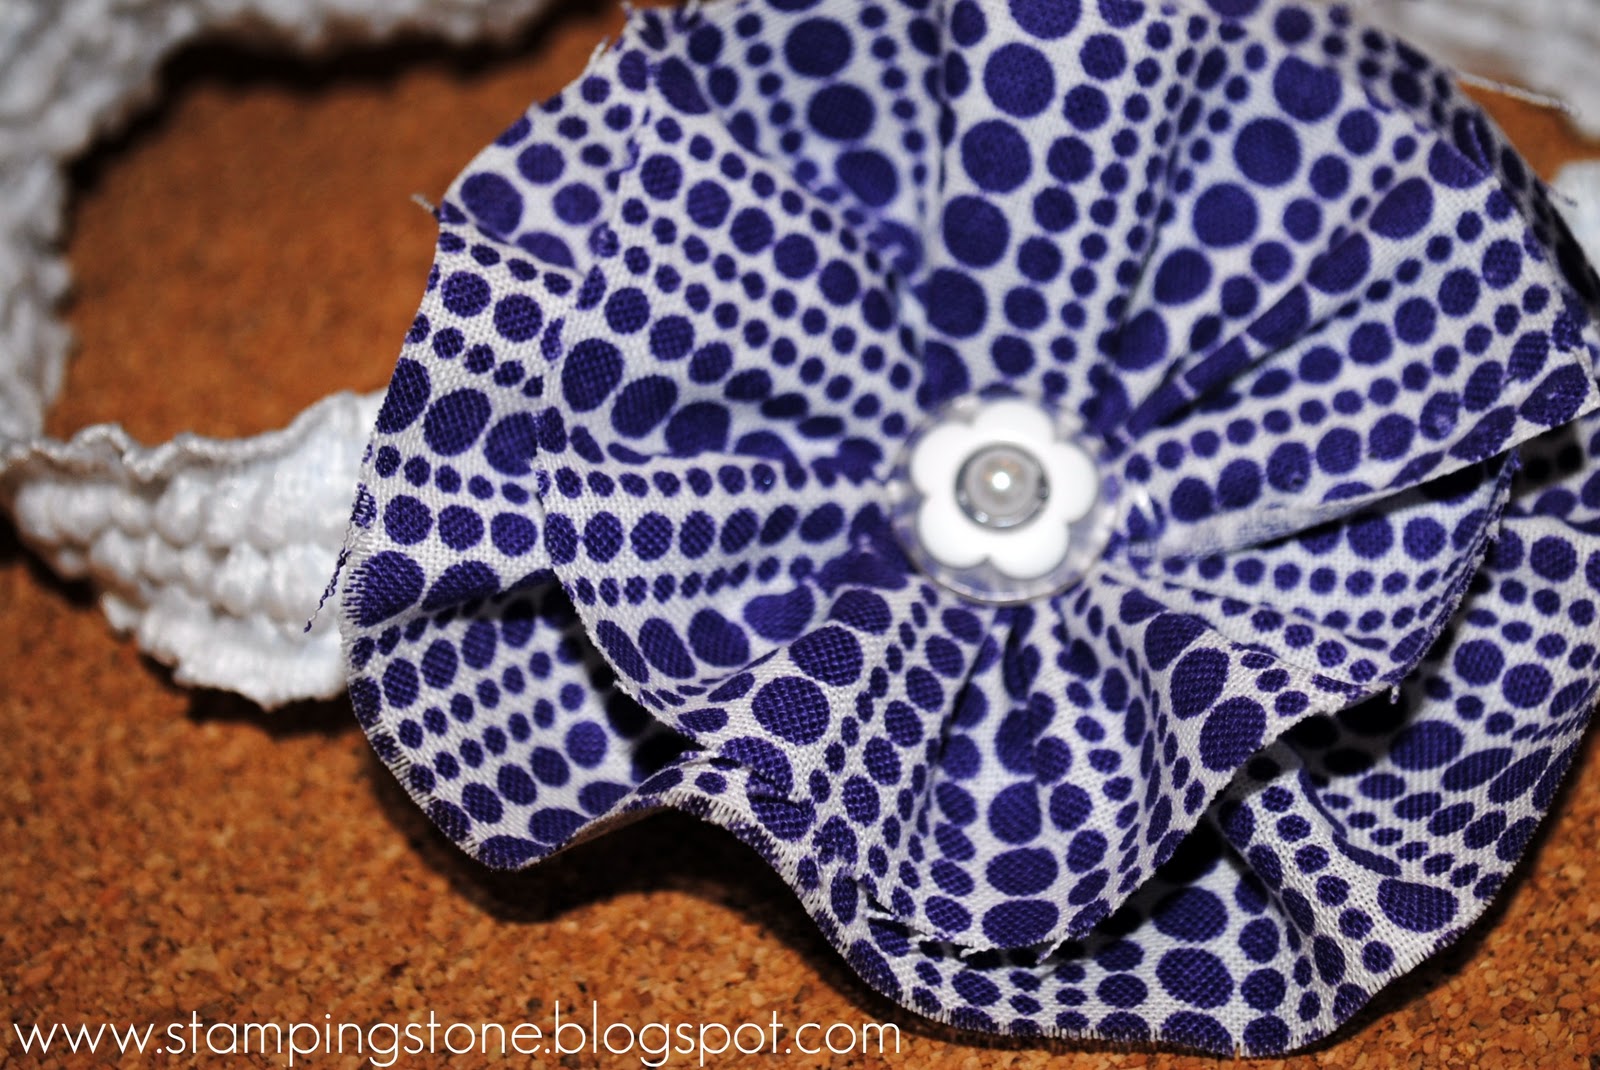
So, it came to me, I was making several headbands to give my daughter for her birthday - she looks fabulous in them - and decided I was going to make some for myself and make myself wear them!

We'll see how that goes.....I'm stubborn.

In the meantime, I wanted to share the headbands that I made for Hunter.  I made them in kind of a hurry, so I didn't take the time to do tutorials while making each one.  I will do that when I make some more.  I will also be adding these to my Etsy shop, so keep checking there too!


So there they are!  I hope you like them! 

I'm almost done editing photos for the Necklace, Hair Pin and Ring tutorial.....so keep checking back for that!  That set is already listed on my Etsy shop, while supplies last!

Have a great rest of the week!  Thanks for stopping by!

Monday, September 26, 2011

Hanes Comfort Toe Seam Socks


I was recently given a chance to try out the Hanes Comfort Toe Seam Socks.......and I love them!  Just as the name suggests, there is virtually no seam to try and adjust depending on what shoes you're wearing to avoid those sore spots on your toes.  They. are. awesome.


The seams are so small, and not noticeable at all when you are wearing them.  I don't know about you, but I have certain shoes that I can't wear certain socks with because the seams are bulky and eventually before the day is over, they leave a sore spot.  No matter how many times during the day you try to adjust the socks, twising and pulling, the only thing you accomplish is creating a new sore spot.

And the fit is totally awesome.....yeah, I totally said "totally awesome".  I have washed them several times, and they still fit just as well as the first time I wore them....no shrinkage.  The heel even fits well.  I don't have to pull down the heel part to actually get it on my heel, leaving a big bunch of fabric on the bottom of my foot.  Or the alternative of just pulling it up so the entire heel of the sock is sticking out of the top of your shoe.  Real attractive with shorts!  Socks shouldn't be this much work people! 


But wait....there's more!

These socks come in sizes to fit the whole family in all different styles.  You can get them from crews to ankles to no shows, and in different colors too!  You can find them in stores like Walmart, Target, Kmart, Kohl's, JCPenney, Sears and more.  So go people, go get comfortable.

On a side note:

Sunday, September 25, 2011

Flower Necklace, Hair pin, and Ring Set


This project turned out so well!  I was so excited!  I love the mix of the two types of fabrics together.  The gingham print is a cotton and the gray solid is sort of a silky fabric -- it was in my scrap fabric, so I'm not really sure!

I made a whole set - necklace, hair pin and a ring.  I was kinda on a roll and almost added a bracelet too, but thought it may be a little much!  Maybe later.

Here's a closer look at each piece:


I am in the process of editing all the pics for the tutorial that I will be posting this week!  So keep checking back...or sign up for my blog updates by email and you'll get an email whenever I post something new.

Thanks for stopping by!  Have a great week!

I am linking this project to these link parties:


Thursday, September 8, 2011

My Etsy Shop

I have a few items for sale on my Etsy shop now.  I really underestimated how long it would take to photograph, edit, and list each item!  I have 10 different variations of the same item up - Large Clothespin Photo or Note holders.  I have a few different colors, each with different embellishments and lining.  These are gone when they're gone!  I don't have any more of the large clothespins at the moment, unless I happen across some more at some point.  So if you are interested - don't wait too long!  Here's a little sneak peek....


Here's the link to my shop so you can get a better look at each one - http://www.etsy.com/shop/StampingStone

I will update you whenever I get new stuff listed.  I will be updating here on my blog, on my Facebook page and on my Twitter.  You can sign up to follow me on any or all of those by clicking on the buttons on my right side bar!

We got a few projects done around the house over the holiday weekend - I will post some pictures soon!  I have a few different projects that I'm working on this week....also to be posted soon.  I have a few birthdays coming up, so I've been trying to gather as many ideas as possible for some homemade gifts!  There certainly isn't a shortage of ideas, I'm having more issues trying to narrow it down!  LOL!

I hope everyone is having a great week.  I am certainly enjoying the nice fall weather here in Missouri!  I'm not sure how long it will last, but I'll take it as it comes!  What's your weather like?  Do you wait until your weather changes before you start your fall decor, or do you just go by what month it is?

Thanks so much for stopping by!

Friday, August 26, 2011

Home Sweet Home Featured!


I'm very excited today to tell you that my Home Sweet Home project is being featured by Allison at Little Lovelies today!  I've never spoken with her, just a few emails last night when I found out, but I have followed her blog for a while now and I can tell by her writing and just looking at her picture that she is the sweetest thing!  I'm so honored to be a part of her Five Things on Friday Link Party Features.  Go check out Little Lovelies and see the other four cards chosen....wow!  Thanks so much Allison, for including me in this!

Monday, August 22, 2011

A Tutorial.......the Saga

Oh my goodness......I can't believe I'm finally posting this tutorial!  After a week of frustration trying to get this done, my camera not working for the pictures for said tutorial, and knowing we were going out of town over the weekend had me in fits by the end of last week!  B U T......after taking a deep breath and my sweet J buying me a new camera (!), I finally finished pictures this afternoon and am ready to post.  So I apologize for some of the pictures - those are the one's that were taken pre-new camera.  My flash just stopped working and the lighting was not good.  I did the best I could using my editing, but my editing skills could use some work too! 

I created this project using the Book Bag and Bookworm digi stamps from JW Illustrations.  These are such sweet images - I love them!  I made a card with a little pocket that hold the little Bookworm Bookmark.  Here's the finished project:


I started out choosing 3 colors of card stock and printing the Book Bag image on all 3 pieces.


Next, I cut the images apart picking and choosing which pieces I wanted in the different colors.  This part was fun!


As you can see in the above picture, I took the brown pieces and the red pieces and ran them through my Big Shot using some texture plates.  Here's a closer look:


I attached all the pieces on the brown Book Bag image and used a blade to cut along the top of the pocket on the front of the backpack to make the opening for the Bookmark.  Then I used a white piece of card stock as my base and started piecing the pieces together using adhesive.  On the brown Book Bag image, I was careful to use the adhesive only around the edges to leave the middle part open to allow the bookmark to slide in and out.  So for this, you need a nice sturdy adhesive -- I love the red line tape.  It works awesome on projects like this and especially for boxes and 3D items - it really stays together!

Now this is where I'm missing a few photos because of my camera going and dying on me (sniff, sniff).

I printed out the Bookworm image and used the watercolor technique to color it in.  Then I cut a strip of the yellow card stock, after measuring how long the Bookmark needed to be so it could slide in the pocket appropriately.  I used adhesive to attach the Bookworm to the yellow strip and then trimmed around the Bookworm.  It added another layer to the Bookworm image to give it a little thickness.  Then I personalized it with some adhesive chipboard alphabet from K & Company and Making Memories.  I love these - they are so easy to use - just peel them and stick them!


Here's a few shots of the Bookmark in action:


I hope you enjoyed the tutorial and I hope you visit JW Illustrations and add your link using the Book Bag image.  We can't wait to see what you come up with!

I am linking my project to these link parties......come link yours up too!


Until next time........have a great week!